Showing posts with label freebie. Show all posts

Thursday, September 14, 2017

Proactive vs. Reactive


It's the beginning of the year and the honeymoon is REAL y'all! Things are jiving, behaviors are chill... but as the days go on... we start to hear talk that may resemble "STOP!" "Get out!" "You're so stupid!" "I can't do this".. etc, etc.

It's frustrating right? Especially after we've discussed school rules, created our own rules in the classroom, and have been working hard to build routines. Our school has 3 basic rules: Be safe, be respectful, and be responsible. They're great because so many things can fall into them.. but what about real life social skills?

If you've ever read or heard of the 7 habits of highly effective people, or the 7 habits of happy kids, you may know that the first habit is BE PROACTIVE. (For more info: The Leader in Me)

Get posters HERE.

So inspired by the first habit, one of the MOST important lessons I taught my students at the beginning of the year was the difference between being proactive and reactive. Short and sweet, proactive people are positive and solve/fix problems, while those who are reactive can be negative and make them worse.

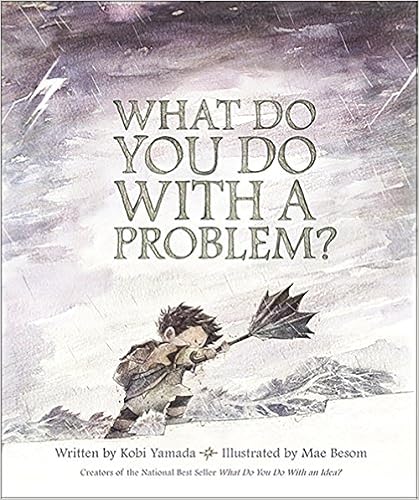
While there are a TON of great read alouds where characters engage in a problem, many times with it getting worse before it gets better, my all time favorite to read for this lesson is What do you do with a problem? by Kobi Yamada. It tells of a character who struggles with a problem which grows bigger as he tries to avoid and ignore it. When he finally decides to face it, the character learns a valuable lesson about problems.
While we read, we also fill out an anchor chart comparing what both words LOOK like, FEEL like, and SOUND like. While the boy does not SAY the words listed on the chart, I borrowed a few from different growth mindset bulletin boards I had seen around (HERE and HERE)

I'm always amazed at how much these words are used throughout the ENTIRE school year. Many of the different behaviors exhibited throughout the school day fall into either category, and I've found it so helpful to be able to use these words to classify what type of behavior it is. It also helps students self reflect and make connections back to What do you do with a problem?

If you're interested in reading about how I implemented this lesson in class, scroll down! I use a structured mini lesson format, which you can read more about HERE if you'd like a quick and dirty on how I've organized it! This lesson runs longer than typical mini lessons usually do since I'm reading the WHOLE book, but I've still structured it the same.


MINI LESSON: Proactive vs. Reactive (30 minutes)

Connection: Ask students if they've ever been in a fight before. Maybe with their friends? Their parents? Their siblings? Allow them 30 sec think time. Have them turn and talk with a partner for a minute. Call them back together and ask for 2-3 shares. (TWIST: Ask them to tell about what their PARTNER shared) I agreed with many of their stories and mentioned a little about how my brother and I always fought as kids. I tell them that we encounter many situations throughout the day, and it's important to think about the choices we can make.

Teaching Point: Today we are going to focus on these different choices and classify them into two categories. On the anchor chart I write proactive and reactive.

I ask students to look at these words. What do they notice? Are there are prefixes, suffixes, smaller words they see in them? (Great connection back to vocabulary and what to do when encountering words we may not know) We see both words have ACT, so these have something to do with how we act. IVE is a suffix that makes these an adjective which describes how we act. PRO is a prefix that means forward, so in PROACTIVE you are moving forward to find a solution. This is positive. When we are REACTIVE we react to something before we think through our choices! This can be negative and can land us in trouble. I'll draw a smiley face and a frowny face next to the words to help with visual.

Next I'll show them the book we read and set the purpose for them to pay attention to the main character and think about what they DO, what they SAY, and how they might FEEL in the story while dealing with their problem. The first page or two I read, and then I will think aloud showing students what I notice about the character. From there we will decide if that's proactive or reactive. I'll begin to list it by the eye I've drawn (what the character looks like/what they do), the ear (what they say/how they sound), and the heart (emotions). The beginning of the book shows a lot of reactivity, and as it goes on the character shifts into a proactive mindset.

Active Engagement: I'll keep reading here and have students partner talk and then help me list more on the anchor chart. Rich discussions and connections will ensue.

Link: Now that we've created an anchor chart, I give them a graphic organizer and have them think about how they can turn reactive problems into class into something proactive. I link it back to the work we have done and how the anchor chart can help them with ideas.

Independent Work: 


Closing: I'm a HUGE fan of exit tickets. (READ MORE ABOUT THEM HERE) Usually I'll give them a scenario that they have to quick write on to show how to be proactive or a scenario that a person can change from being reactive to proactive. You could even show a visual and have them use a T-chart to write about how the person is being proactive/reactive.


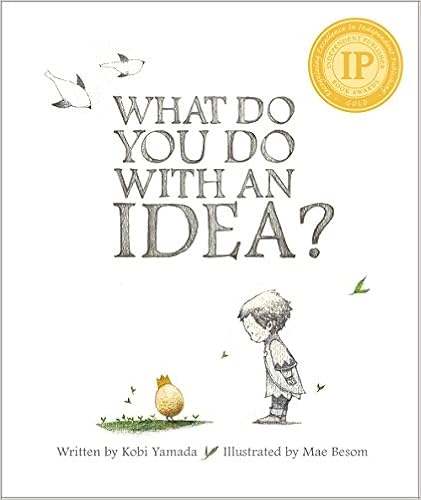
And if you liked What do you do with a Problem, and are feeling this whole growth mindset thing, check out this book, What do you do with an idea? It tells the story of what can happen to our ideas as our confidence grows.
Saturday, August 19, 2017

Exit Tickets and Self Assessment with Marzano


So we've all heard of Marzano yes? You know that vocabulary guy who has lots of research into best practices?


Well, one (out of MANY) ideas I've gotten from his books had to do with student self-assessment. I've loved the idea of having students be involved in goal setting and teacher conferences, so when I found another idea on allowing for student reflection, I jumped at it!

To assemble them, I grabbed two pieces of cardstock and cut one of the pieces shorter. On the shorter piece I made sure to glue the self assessment picture down, and then laminated both pieces of cardstock seperately I then placed the shorter piece on top of the larger piece, and used decorative duck tape to adhere them together by taping the sides and bottom. Voila. A pocket! I stapled them in order right next to the door so students could drop things in easily on their way out.


So, the idea here is that there are 4 levels of understanding. At the end of a lesson, I would have my students do an exit ticket or perhaps take their graphic organizer/work for the lesson, and place it in the folder that they felt matched where they were in their learning of the concept. They 4 areas they could choose from were:

Novice: This is where students were completely confused and had a lot of questions.

Apprentice: Students still needed help or partners with their work, but they had a basic understanding.

Proficient: Students understood the material and were able to work on their own although they may have a question.

Distinguished: Students got it and could teach it to others or get in front of the class and explain it in their own words.

At the end of the day, I was able to go through and check out not only students' work, but assess they're understanding of their learning. This led to great conversations of students who constantly rated themselves lower than what their work proved, as well as students who rated themselves much higher than their work proved. I used this with fifth graders, so since it was upper elementary, it was a great real world skill to teach!

This also plays right in to grade percentages too, but would be amazing for those of you doing standards based grading as well!

THINK:
69% or less: Novice
70%-79%: Apprentice
80%-89: Proficient
90%-100%: Distinguished

Interested in trying these out? Get them free here!

Tuesday, August 21, 2012

Classroom Economy

A few weeks ago I had posted a Monday Made It about my classroom economy helping hands board. I had quite a  bit of interest in what I do, so I have finally gotten this post worked out... AND A 30+ PAGE FILE FOR FREE FROM TPT WITH EVERYTHING YOU ARE ABOUT TO READ ABOUT! :)

So here goes. How I do a classroom economy in my 2nd grade room!

THE JOBS
In my room, each student gets a job. I have a list of 25 so far that I use for my classroom. I have the jobs displayed on my helping hands board.

Each hand has velcro on the back, so when students change jobs every 2-3 weeks, I can easily move their number! I am really excited about using this this year. The colored background is just scrapbooking paper that I cut up into 4in x 6 in rectangles. That way a 12in x 12in piece of paper gave my 6 equal rectangles. Then I glued on the job name and clipart, laminated it, put velcro on, and then adhered the numbered hand!

THE APPLICATION
Now for my students to get a job, I have them fill out a job application. I have two different versions that I've used.

This one I use currently for my 2nd graders.
This is one I used with my 5th graders.

At the beginning of the year I go through each job and we talk about what the duties are. I'll show them my ring of jobs, and flip through them all so they can visually see what that job's duties are.

When they begin their application, I model and do an example application at the beginning of the year to make sure my students fill them out with COMPLETE sentences and SPECIFIC reasons for why they want their job. Each job they've chosen needs a good reason for why I should hire them for the job. For example:

1. Veterinarian
2. Tax Collector
3. Operator

1. I want this job because I am responsible and help take care of my dog at home.
2. I want this job because I am good at math and wouldn't let anyone forget to pay their fines!
3. I want this job because I am polite and know how to answer a phone.

You'll be amazed at the creative responses students will give! I make sure to let my students know that neat applications with fabulous reasons will always persuade me to give them their first choice. We also talk about how behavior in class can affect getting their dream job as well. If they're not respectful, then how can I trust them to take care of our class pet?

Another thing we discuss is that sometimes a student might not get any of their choices. We do some role playing on how to act if that were to happen, and I let them know that if they are a good sport I will make sure they get one of their choices next time!

What if a student is irresponsible and doesn't do their job? Well, I fire them! I tell them all the time that if they can't do the duties of their job, then I will give it to someone who can. Just like what happens in the real world!

What if a student doesn't want a job? So far I've only had one student in my years of teaching refuse a job. I let him be unemployed. I wasn't about to pressure him into a job if I knew I would just end of firing him from it. By the next job cycle though, he had noticed the extra money other students were getting and wanted to apply. If he hadn't I would have sat down and discussed what it was that made him not want to have a job.

THE MONEY
So I keep talking about money! Well YES! My students earn money for everything they do! Participating, trying their best, helping another out without being asked, just sitting their quietly, ANYTHING! It's amazing what the other students will do when they see me paying their friends for good behavior. And the great thing, I don't even need to break stride from my lesson.

When the year starts, I always have students design our classroom money. We then take a vote on which is our favorite, and that is the design I will copy for the year. I love that it is student-made and different each year! Here are some examples from the past few years:
I always make 1's, 5's, and 10's for kids. It's such a great way for them to practice skip counting and the real world skill of counting money!

To help kids keep track of their money, I usually give them an envelope. My coworker actually sewed little wallets! Super cute! And in past years with my 5th graders we all did a little origami, and folded our own wallets out of construction paper. I used the instructions found here on youtube.

THE TAXES AND BONUSES
Now students don't just earn money, they can lose it too!

During the first few weeks of school we decide on taxes and bonuses. Taxes are where students owe the teacher money, and bonuses are how they can earn extra money throughout the day. Here are some posters on what we came up with last year:

I also have students give out possible dollar amounts for each item they come up with, and they vote on how much that particular tax or bonus should be.  Although.. the teacher always receives the right to veto something outrageous! I feel like students have more ownership this way.

THE FINE CARD
To make it easy to track student's taxes, I place a tax card on their desk. Each tally is worth $5. If they commit an offense that is on the tax chart like talking out, I can quietly without breaking the lesson, make one tally mark. The students realizes what they've done and hopefully corrects it. If not, I have no problem tallying them again. And again. And again if necessary. I've done it!!


Students pay their taxes/fines at the end of every school day. You could have them do it once a week if you choose. One of our classroom jobs is a tax collector. At the end of the day they go around checking how students added up the tallies and making sure all taxes are paid. They will put a star next to the day it is to show that student has paid. If a student cannot pay I usually do a lunch detention, or recess loss, or working their debt off. Whatever the situation entails. Sometimes other students will loan them money.. super cute!

Here's an example:

THE STORE
Everyday at recess, I allow students to bring their money out and buy something. I have items for $50 $75 and $100. I try to create things for students to buy that won't cost me a lot of money.


Students LOVE LOVE LOVE buying things off our posters! It's amazing how much they enjoy lunch with the teacher, or buying a pillow for the day! The really sweet thing is when they start to share money and buy things like special lunch together! It's adorable that they are willing to put their money together and work as a team.

THE EXTRA MILE
Since I've been in 2nd grade, I haven't done too much besides what I mentioned above. Some things I did do when I taught 5th grade to take the economy to the next step:
  • Wrote checks for students for doing their jobs.
  • Had a banker stamp and enter checks onto a spread sheet. They would add it to student's previous balances and write them a receipt for their current account balance.
  • Students cashing checks would sign their check on the back in cursive.
  • A cashier would open the store every month or so. They had a cash register they used to ring up items. 
  • Students buying items would have to figure out if they had enough to spend on what they wanted. They would then have to write a check in cursive for the amount they spent. They would then subtract it from their bank receipt to see how much they had left.
  • Students were also charged rent for their desks and had disaster strikes to their desks. I'm thinking insurance could be fun to have them buy too so if disaster strikes, insurance helpers could help them fix it up.
  • I've read on Beth Newingham's about a class economist. They analyze what's being bought at the store and create graphs about it. Sounded cool! I've gotten a lot of my ideas from her, so if you are interested in more, definitely check her site out above!!!
Are you interested in a classroom economy after all this?!?! Well I promise a 30+ page file with all that you saw above for FREE!


Please let me know what you think :) I hope y'all find it helpful. If I could give anyone advice, it would be to start a classroom economy! It's the most amazing management I have every found and teaches such great real world skills!

Thursday, July 12, 2012

Things for the First Day

So... summer sure is flying by! I cannot believe it is almost mid July! I've seen quite a few panic posts made lately about how there is still so much left to do! I definitely am feeling the pressure too!

One thing I did at the beginning of the summer was begin to get my first week written out in lesson plans. Somehow I didn't save mine from last year?!?! Of course...

Every year I always start out the first week with a time capsule. It's so much fun to see our students grow, but sometimes I don't know if they can see it! This little freebie below is a great way to get students to recognize that! Here are the first 2 pages of the 7 page freebie:


Since I've taught 2-5th grade, there are a few similiar pages included, which I figured you could pick and choose what you wanted to use. For second grade I use:

About Me
Hand Print Tracing
Foot Print Tracing
Fill in the Blank

The rest I feel are geared more for older students. I've added pictures to the About Me page too since I noticed a lot of students at the beginning of second still needed help reading.

While they are working on their time capsule, I walk around with string and measure how tall they are.

Once they have finished their pages and they have their piece of yarn, I place it all into a zip loc baggie. I hide them away in a cabinet, and students don't get them back until the last day of school. They are so excited to see how their handwriting has changed, and how different their hand/foot prints are. It's also amazing to see how much they have grown when they hold their piece of yarn up!!

A few books I ALWAYS read are:

I'm also thinking of starting an author study right off the first week. I'm thinking Kevin Henkes!

And has anyone seen the updated version of the first 5 days of Daily Five on the sisters site? I tried it out last year and LOVED it.

I've linked up today with Molly at Psyched to be in Second and Teaching Joys today!


Freebie Fridays


What are some tried and true things you love to do the first week of school?

Oh and thank you to all of the sweet comments about Dave (my bofriend's) birthday gift. He definitely loved it and was surprised! But now what to do with all these deflated balloons? Well... here's one thing Dave came up with

Oh Hunter, you are sooooo patient :)


Oh and don't forget to check out Kate's awesome giveaway! :)

Monday, July 2, 2012

Monday Made It Classroom Jobs

Okay before I start this post, can I just tell you how productive I feel today?!?
  1. 2nd day of bootcamp - hello summer body!
  2. Took dogs on a long walk.
  3. Pulled weeds in the front yard.
  4. Completed my Monday Made It!
And it's only noon! For me, this is a mighty accomplishment! Although now I have a heating pad on my lower back because I think I might have pulled something? Hopefully not. I have a lot more bootcamp left to do!

On to my Monday Made It. I was inspired by one of my pins:

I bought all of my supplies BEFORE I went ahead with my safari theme for next year's classroom, but I think it will still work. I've always had my job board called Helping Hands so I thought this was too cute NOT to make.

First I bought 12x12 scrapbook paper from Hobby Lobby, and cut it into 6 pieces. The pieces are 6 x 4 inches. You can get 6 pieces out 1 scrapbook page.

Then I added clipart and the job title, printed it out and glued it to all the different patterned papers.

To make it easy to change the little hands, I bought this Velcro at Lowes.

Then I attached the Velcro to the paper, and the back of the hands. It turned out like this:

Feel free to save this hand outline and use it! I actually drew this myself! How I love Paint Shop Pro. :)


I'm excited to post these up in my room! Last year I was using index cards taped to my cabinets, and they were forever falling off. Super annoying.

I would love to post the little clipart, but I have found them from various places on the internet, and don't know about copyright and all that with them. I've had the same clipart for about 5 years now and have NO CLUE where they came from.


In my room EVERY student has a job. We do a classroom economy. It is hands down, my favorite management tool and valuable teaching. If there was one thing I would suggest to new teachers- it would be this! Here's a list of some things we do:
  • Each student applies for a job every 2-3 weeks. (You can make it longer if you like!) Their application must be neat and in complete sentences. I'll share my applications when my computer is back up and running.
  • We create class money at the beginning of each year. We vote on the design. I copy 1s 5s and 10s. Money is given out for participation, great answers, great behavior, jobs done- anything really.
  • We create a bonuses chart (where students can earn money) and taxes chart (where students pay ME money). As a class we decide on the prices as well.
  • Each student has a tax chart (which I'll share later too). At the end of the day they add up their tally marks and place the money on top of their chart. The tax collector signs off on the day that taxes were paid and brings me the money.
  • We have a class store where students can buy things. I don't do a treasure box, this takes its place. Students have to count their money to make sure they have enough to buy stuff. Most of the things I have for sale aren't items. Sure I have pencils and erasers, but we do more classroom rewards. Like teacher's desk for a day, shoes off, lunch with teacher, 10 min computer time, free homework pass, 10 min class pet time, choose first at stations for the day, pillow for the day, stuffed buddy for the day, etc.
  • I use to have a banker/cashier when I taught 5th grade, but I found it a little hard for my 2nd graders this year. Maybe I'll tackle it again this year when I am more organized. Anyone else have advice on this?
If any of you are interested, I'll try to make a post going more in depth when I get back into my classroom so I can take pictures. :) I LOVE CLASSROOM ECONOMIES!

Do you have any classroom jobs that you love and couldn't live without? Any favorites you do with a classroom economy?

And don't forget to view my post about the Safari Clip Chart I made! I left a link for you to download it for free on my post!!

Sunday, July 1, 2012

Safari Clip Chart Freebie

Earlier this week I had posted a clip chart for my Monday Made It. Well I just put it together today and am thrilled with how it turned out!

 Here's the long version of the whole thing. I tried to keep it color coordinated with the animal prints. From pink all the way down to red.


 Here is a close up of the chart.

Here is a closeup of the middle. I have put little safari hats on the end of my clips with numbers on them. That way students (who always have a number in my room) can move their clip easily.

At the end of every day, I plan on having my teacher's assistant (student classroom job) keep track on a behavior chart of where each student was. This will be kept in a binder. They will use markers (corresponding with the color on the chart) and place a colored dot next to the students number. This will be a great tool to use for conferences or any meetings I may have about the student.


I have put it in my TPT store, for free if you are interested in downloading it! Just let me know what you think :) I appreciate it! It's my first actual made by me item! And I found out that you can turn power points into PDF files, who knew?!?!

And I'm linking up with Kreative in Kinder for some awesome blog hopping freebies!


Follow for Freebies