Showing posts with label monday made it. Show all posts

Monday, August 20, 2012

Monday Made It - And probably the last :(

First off, can I just tell you that I have been waking up at 5am for the past 2 weeks to do bootcamp at 5:30am?!?! I cannot believe I have already been going for about 2 months. I definitely feel stronger, and happier! Hoping to keep it up during school- and I'm pretty sure I'll be cutting it close, but I think I can keep up the morning workouts. It's so nice to get off of school and not feel guilty about not wanting to workout after a long crazy day. It's great to get it out of the way first thing in the morning! Not to mention getting that metabolism going and feel energized (until around 10am... haha, but that's what coffee is for!!)

Annnnnnd school is literally just around the corner! We started back and are having our staff meeting this week. Students come next Monday. Got to see our new admin team in action though and it was an enjoyable time! They definitely have a great sense of humor and really seem to have attainable goals for us this year. I mean, our principal alone hosts Harley get togethers with bikers- cool right? :)

I've been busy working really hard in my room, but I'm planning on posting about how it looks a little later. Today I made some last minute projects and cannot wait to share!

PROJECT #1
First up are my TPO (or objective) boards. I hot glued (ummm my NEW favorite thing BTW) magnets on the back so that they stick to my board. That way I can take them with me wherever I am introducing the objective, and then post them back on the wall. I ran out of magnets today otherwise you'd see science and social studies too!
My lovely coworker has a cricut and graciously brought it to school with her. I love the letters on the boards! And can I tell you how mesmerized I was watching it cut the letters? Coolest thing ever.

PROJECT #2
Next up are my chair pockets inspired by Ladybug Teacher Files.

Inside each pocket I am planning on putting a white board, marker, and testing folder. Any suggestions on what else they might need right on hand? I'm thinking math manipulatives that change throughout the year.

So far the velcro seems to be working great in keeping the pocket adhered to the chair. I'm thinking I may put a velcro on the top and bottom instead of one long strip.  I noticed today that my pocket was bulging out since I pulled out the middle seam to make 1 big pocket instead of 2.

PROJECT #3
I've shown my ready to learn clipchart before, but I hot glued my safari hats onto the clips this week. Loving the cuteness.

PROJECT #4
I have been wanting to make dice shakers for awhile, and after reading Amanda's post @ Teaching Maddeness about hers, I KNEW I had to make it happen. So off to Target I went to get those awesome magnet containers. (You can also see my duct tape Boggle board hanging up too!)
I too hot glued felt along the bottom and the side of the container. Then I popped in some dice and hung 2 on my board to see how they worked. I LOVE them. I make everyone come into my room to see them!  Cannot wait to use them during mathstations.

PROJECT #5
So I'm sure you've all seen the picture frames all over pinterest about the first day of school. I finally did mine! I got a 16x20in frame from Hobby Lobby (40% off of course), painted it black, and then velcroed on the letters. That way I can move them if I need to AND I can remove the FIR in First to change it to LAST for the end of school. Awesome right? I'm in LOVE with this project.
To create the letters I used the font Janda Manatee Bubble and printed them out on scrapbook paper.

PROJECT #6
I just did this 5 minutes ago, and it has to be one of my favorite projects yet! I've seen this on pinterest and have had it on my to do list. After visiting my coworker's room today I saw these up by her door AND bathroom door!

She's planning on having them slap it in order to leave the room or use the restroom. What a great idea! Now I'm thinking of making one for the hallways that I hold on to so that when entering specials or lunch, they have to do the same thing. Just need some more scrapbook paper! :)

For the hand, I used my my helping hands clipart and just enlarged it. Snag it below if you are interested!
Coming up this week: Classroom Tour and a HUGE 30+ page freebie about my classroom economy equip with job applications, job cards, job descriptions, tickets, money, fine card, etc!!! Happy Monday everyone! :)

Monday, August 6, 2012

Monday Made It... Better late than never!

So school is creeping up around the corner.. but that doesn't mean I'm not busy still creating things! Here's a peek and what I've been up to this week.


Project #1
These awesome magnets are going to work perfectly for my ketchup and pickles board. If you're not familiar with what it is, I found it on pinterest here! Basically students move their magnet to the ketchup (catch up) side if they didn't do their homework. In my class, I have students take it to lunch with them as to give them another chance before they take have to do it at recess. They can also become a ketchup if they don't finish their classwork for the day. I tried it out last year for the first time and my kids went nuts for it! It's also a fabulous visual for me to see which students still have work to finish up. Thanks so much to Elizabeth and Fun in Room 4b for the numbers to print out and directions to make them!


Project #2
 Mod Podge cliboards. Enough said.

 Project #3
 Brain Breaks from 3rd Grade Thoughts. I LOOOOVE these! I've been meaning to make them for the longest time. So glad I busted them out this week because it was quite the project! Cutting, laminating, cutting again, hot gluing, and then making a few brain breaks of my own to add! Now I am the happy owner of 70+ brain breaks. Not sure if that buckets is what I want to use yet.. as you can see it's a bit jam packed.

 Project #4

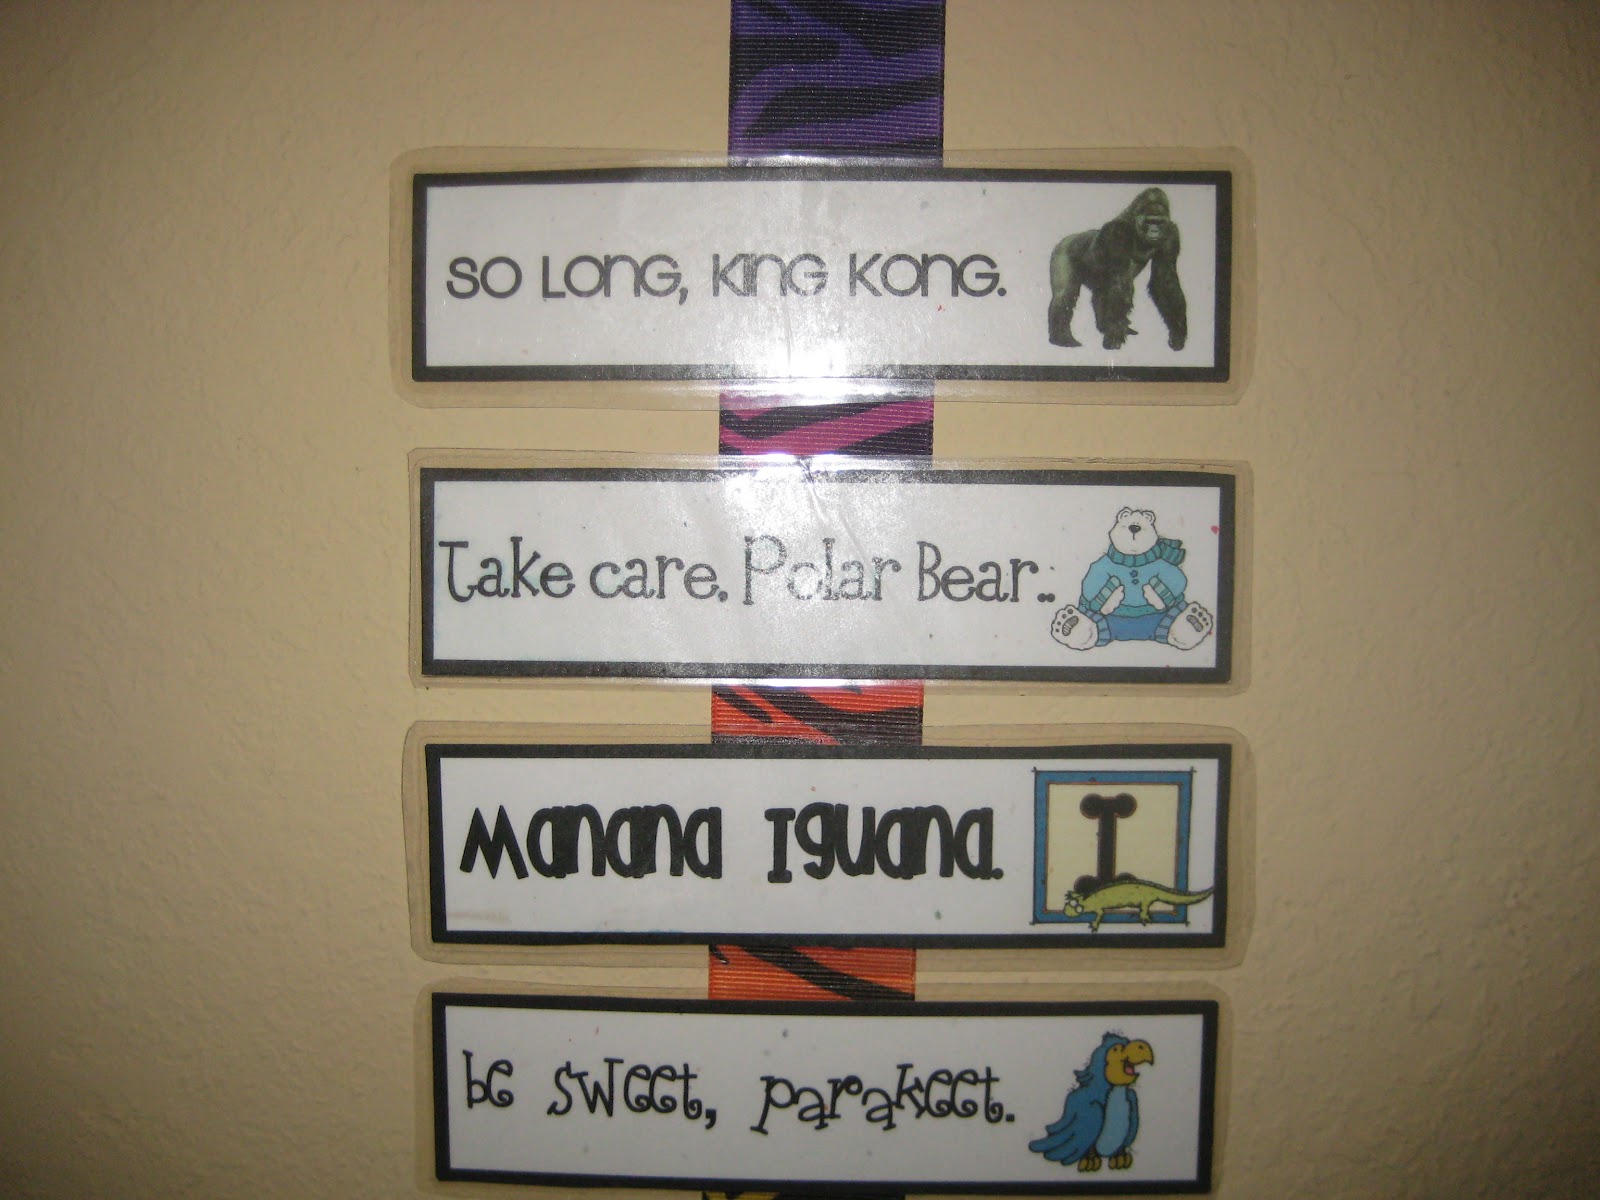
I posted about these AWESOME good bye rhymes I found over at The First Grade Parade last week.Well I finally hot glued (I was a hot gluing QUEEN this week!) them to some amazing rainbow zebra print ribbon I found at Hobby Lobby. Can't wait to use more of that ribbon. I LOOOOVE bright colors, and the animal print added in? YES please.


Project #5
I also mentioned about how I organize my math stations last week. Well I FINALLY got it together and decorated the drawers of my tubs. As you can see, I am organizing math this year by math concept. I'm hoping that will keep me much more organized. Thank goodness for this awesome tutorial from Kinder Craze!


I feel like I did more... hmm. I wanted to post more pictures of my classroom but seeing as I had to tear everything down to put in my new room, that may have to wait until next week!!

Monday, July 30, 2012

Monday Made LOTS OF It!

Yeeeeeeeeeeaaaaaa! Another successful Monday Made It!!


PROJECT #1
One of my teacher buddies even came over this weekend and we had a Pinterest day! So much fun! This definitely needs to happen again in the future! Not only were we able to talk and catch up, but we were productive as well! She made a teacher toolbox and I made some of the things below. We drank lots of coffee and I made this for lunch.
 Buffalo Chicken Quinoa Mac and Cheese

Can we just talk about how awesome it was? Even my boyfriend who hates quinoa loved it! Super easy, super good, and definitely to be made again!

On to my made its!!

PROJECT #2
First up, birthday balloons! Love these ideas I saw popping up all over! I found the balloon at Tunstall's Teaching Tidbits. She used pixie sticks, so her balloons were very large! I made mine a little smaller and added "Hip Hip Hooray It's your Birthday today!" I found the straws 6 for one dollar at Dollar Tree. LOVE that place!!

PROJECT #3
This is my third year using Whole Brain Teaching. I love these little cards that Stephanie at 3rd Grade Thoughts made. Cannot wait to post these up this year! I printed and laminated them.

PROJECT #4
I mentioned buying these from Kristen at Ladybug's Teacher Files last week. Well... here they are! All printed, cut out, and laminated! My plan is to put magnets on the back and stick them to my whiteboard.

PROJECT #5
So this is absolutely my biggest challenge so far. This was my first year teaching with math stations as one of my rotations. (You can read more about how I do math workshop here!!) I have accumulated so many games, and definitely had storage issues with them. My summer project is to get these organized before school starts in a few weeks.
 Just this week I pulled out all the games and organized them into piles sorted by math concept.

In addition to sorting them, I made sure that each game was placed into a large ziploc bag. Then I wrote the name of the game on the front. This game below has multiple copies so it's much easier for me to keep them all in one bag.

 Within each bag is each indivisual game which I usually keep in a page protector. These have proved to be AWESOME this year! I can stick the gameboards, pieces, cards, EVERYTHING in one easy to hold case. Best of all it's cheap! Some of my games need dry erase markers, and these page protectors can easily be written on and erased! Best of all, you don't need to laminate game boards anymore! This has saved me lots of time last year.

On the back of some of my game bags I have written materials that are needed. I don't keep dice and other game pieces with every game because I don't have enough. By writing what the game needs on the back, I'm hoping that it will be easy to play right away and will help me be better prepared. I'll try anything if it cuts down on prep time.

My next project will be turning all the sterilite drawers I have at school into something like what Mrs. Bond did in her room:
But instead of months, they'll have my different math concepts with all the stations not being used by my students, housed and organized inside! Get ready to see this next week!

PROJECT #6
Now that I have my math stations organized, next up was organizing all of my math worksheets, master copies, and projects. Last year I kept them in file folders, and I was horrible at returning the papers to the correct folder. For some reason filing just did NOT work for me. I've decided to use binders this year.

 Just like my math stations, I am creating binders based on math concepts. So far I have:
  • Measurement
  • Place Value/Patterns
  • Money
  • Probability/Graphing & Data
  • Fractions
  • Addition/Subtraction (which I divided up into single digit, double digit, and triple digit using divider tabs)
  • Multiplication/Division
  • Geometry
Download them HERE for FREE if you are interested in them! :)

Here's a peek inside my Measurement binder (I plan on using dividers to make sections for customary, metric, area/perimeter, time, temperature, weight, and liquids:
 I have my master copies that I used during my Current Events or Team Meeting stations.

 I also kept some of my student's work for some of the projects we completed. This was one of my favorites! Students were given 6-8 strips of paper of various lengths. They had to measure each of them, then turn it into a picture. This student created an alligator that could even open its mouth when you pulled up on the orange strip!! So creative! Then the students added up ALL of the strips to get a final total and named their creation! I'll have to highlight some of my favorite math projects before school starts!

 I also used page protectors to house cards, leftover project pieces, manipulatives, specific team meeting or minilesson games, etc. Anything that couldn't be hole punched and that was not specifically a math station.

And then more master copies. It's going to be so much easier to put them back in this binder rather than in a folder!!

PROJECT #7
And now for my BIG HOME PROJECT REVEAL!!!!!!

DUN DUN DUUUUUUUUUUUUUUUUUUUNNNNNNNN

Remember my dining room wall from last week?

Well we finally finished the taping, and began painting last week. One thing we did once the tape was on, was paint white over the edges of the paint. We have a textured wall and we wanted to make sure when we painted our stripes, it wasn't going to bleed under the painter's tape.

 Well after we painted the grey stripes, we found out the orange we wanted to use wouldn't cover the green paint that was originally on the wall (even though the orange paint had primer too! Lesson learned, when painting with orange, grab a can of primer too no matter what!) Soooo a quick trip to Lowe's and we snagged some primer and had the lady add a little orange tint to it. Although in the picture it looks pink.

Cute story- the boyfriend commented how the picture above would look cute in a little girl's room because of the pinkish and grey colors. Cue "AWWWWWWWWWW" moment!

Anyway, 2 hours later we were able to paint on the orange.

And did the peeling of the paint later that night.....

AND TADA!!!!!! We are super proud! Those orange flowers above were the inspiration for the orange colors! :)

They stripes look really straight and I am soooo glad we put small white lines in between the colored ones. Some of the paint bled under the tape though, so we have some touching up still to do. You can't tell from far away, but to be honest, for a first attempt I'm impressed!! Definitely a loooooong process, but the results in the end were absolutely worth it!

Monday, July 23, 2012

Monday Made It: School AND Home

Okay, so I have had another busy week and I could not be more excited to share with you some things I made this week! Thanks again Ms. Tara!!

First up on the school front, teacher toolbox, DONE. Still thinking if I should spray paint it silver... but I love red. It's just not matching perfectly with the bright zebra prints. A big thanks to Elizabeth at Fun in Room 4B for posting THIS awesome editable template to make everything go so much smoother.

I cannot wait to use these this year. Whenever I give directions, instead of the "What do I do next?" or "Can I use markers?" I will be placing these on the board as we go over directions. For example 1. Cut 2. Glue (gluestick!!) and 3. Color (markers). That way students have a visual on what to do and I can specify what glue and what coloring utensil I want used. They came from Mrs. Bainbridge.
Okay can I tell you how excited I am to use these!?!? My plan is to have them hanging on a ribbon or stapled on the wall by the door. As students leave at the end of the day, I'd like to say one to students, and they say one back to me. What a great way to practice rhyming words too! These beauties came from Mrs. Carroll.

I know you've all seen these. I was inspired by this pin.
I found the buttons at Hobby Lobby and snagged some scrapbook paper there too. Then I printed out 4 "Ask me what I made on Ms. Wilkie's test" sentences. Using the back of the button, I traced a circle around it, cut it out, then pressed it inside the button. I think they turned out cute and I can't wait to use them!

Last school related made it is my duct tape quilt! After seeing the one done by Kathy last week, I could not wait to try my own and turn it into boggle too! I followed this great video tutorial at Classroom DIY.

I did the back of mine a little different. The video wanted you to duct tape the back too.. but I knew I wouldn't have enough tape and also I didn't want to waste it on a side that no one would see.

So to tape up the back and keep it secure I used clear packing tape. You can't even see it! And these baggies are not going ANYWHERE!

Now onto a few projects for my home.

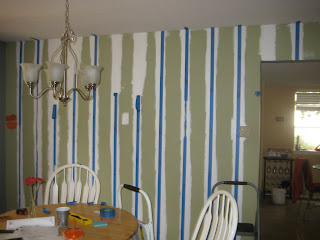
Currently the mister and I are painting our dining room wall. We're planning to make this into our feature wall. It use to be a yucky pea green. We painted to opposite walls a mason gray, and are planning on using the same gray for the stripes, but adding orange in too!

Stripes are extremely frustrating and time consuming. I have taken so many breaks from this! I'm not sure if there's an easier way, but I've been using my level and making sure to keep the tape straight on. Can't wait until it's done. Gonna be bright and bold!!

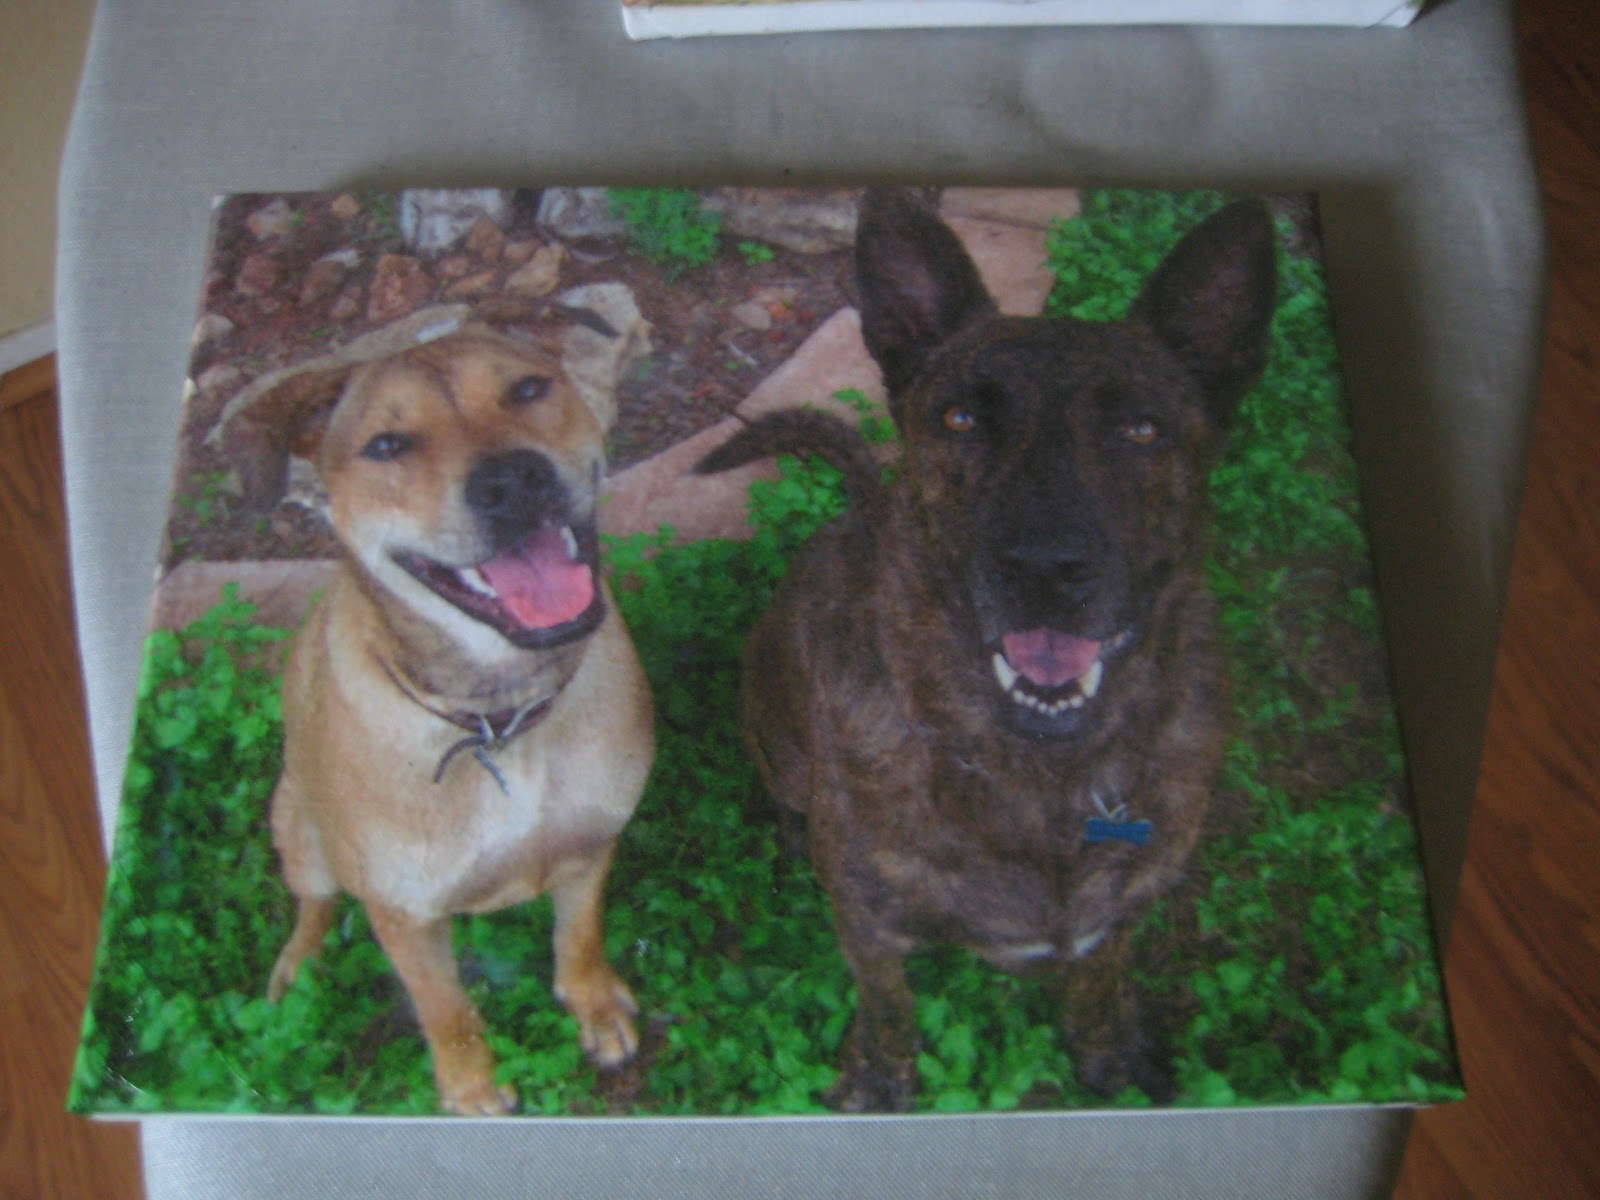
 My next project is the one I am the most proud of, and the one I am planning on doing much more of! Do you remember all the pins about DIY canvas photos? Well... I tried out the tutorial by Crystal at Little Bit Funky and I LOVE how mine turned out! I was skeptical about ironing tissue paper, and then printing on it, but it worked!! Then all you do is modge podge the printed tissue paper onto your canvas! I finished one of these in 10 minutes! The hardest part was getting the picture on the canvas centered.. and then pushing out all those wrinkles. But I feel like it will only get easier as I practice and make more.
 
 This one is going to be given to my parents. I cannot WAIT for them to receive it in the mail!!

I of course had to do one of my boys too! So 50 pictures later, here's the one I chose! I think it's precious.

My canvases are 8x10 inches, and I found a 2 pack at Hobby Lobby for $4. Recently Michael's had a sale on them 10 for $15. I have an upcoming wedding and I think this would make a perfect gift to give! Soooo many possibilities!!

It's been a busy week... but I have checked SO much off my to do list. Planning to go to school today to meet our new admin team and try to get some things figured out in my room. Hopefully this week will be just as productive!

Happy Monday Made It everyone! :D